When you're specifying a servo drive system, fieldbus selection tends to get decided quickly — often by habit, by what the controller supports, or by what the drive vendor defaults to. But the protocol choice has real consequences: it affects wiring cost, axis count scalability, achievable cycle times, and how much commissioning pain you'll face on-site.
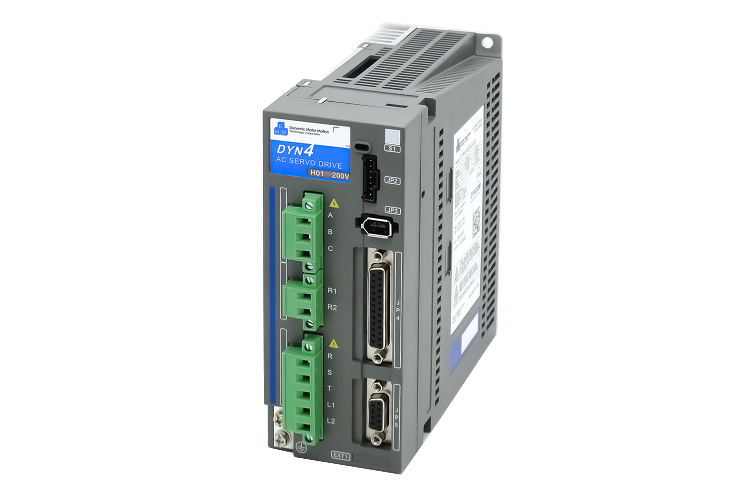
Both CANopen and EtherCAT are widely used with servo drives, including the DMM-Tech DYN4 series we stock. Here's how they compare in practice.
What They Are
CANopen
CANopen runs over the CAN physical layer — a differential two-wire bus originally developed for automotive applications. The CANopen layer adds a standardised object dictionary, device profiles (CiA 402 for motion control), and messaging protocols on top of CAN. It's a mature standard with wide hardware support and a long track record in industrial machinery.
EtherCAT
EtherCAT (Ethernet for Control Automation Technology) was developed by Beckhoff and published as IEC 61158. It uses standard Ethernet hardware at the physical layer but replaces the TCP/IP stack with a daisy-chained frame protocol where each slave device reads and writes data on the fly as the frame passes through. This allows sub-100 µs cycle times with tight synchronisation across all slaves on the network.
Head-to-Head Comparison
| Category | CANopen | EtherCAT |
|---|---|---|
| Physical layer | CAN bus — 2-wire differential, 120 Ω termination required at each end | Standard Ethernet — Cat5e/Cat6, RJ45 or M12 |
| Topology | Linear bus (strict) — all devices on one cable segment | Daisy-chain, ring, tree, or star (with junction devices) |
| Max cable length | 40 m at 1 Mbit/s; up to 1 km at lower speeds | 100 m per segment (unlimited segments with junctions) |
| Bandwidth | Up to 1 Mbit/s (practical: ~800 kbit/s usable) | 100 Mbit/s full duplex |
| Typical cycle time | 1–10 ms (depends on node count and PDO configuration) | 100–500 µs typical; sub-100 µs achievable |
| Synchronisation | SYNC object broadcast — jitter in the low microseconds range | Distributed clock (DC) — sub-1 µs jitter across all axes |
| Max nodes | 127 nodes | 65,535 slaves |
| Cabling cost | Cheaper — standard CAN cable, simple connectors | Standard Ethernet cable (Cat5e), slightly higher connector cost |
| Setup complexity | Simpler — node IDs, baud rate, PDO mapping | More initial configuration — ESI files, DC tuning, master stack |
| Controller availability | Very wide — most PLCs and embedded controllers include CAN | Requires dedicated EtherCAT master (Beckhoff, CODESYS, LinuxCNC, etc.) |
| DMM-Tech DYN4 support | Native CANopen — standard CiA 402 profile | EtherCAT option available on select DYN4 variants |
| Best for | 1–8 axes, moderate cycle times, cost-sensitive builds | Multi-axis (8+), tight synchronisation, high-performance motion |
Timing and Synchronisation in Practice
For single-axis positioning or simple point-to-point moves, CANopen's timing is more than adequate. A 2 ms cycle with CiA 402 profile position mode will give you smooth motion on a single drive with no issues.
Where CANopen starts to show its limits is multi-axis coordinated motion — gantry systems, multi-joint robots, or synchronised winding and cutting axes. At 1 Mbit/s, each PDO exchange takes measurable time, and with 4–6 axes, bus utilisation climbs quickly. You can tune PDO mapping to keep things lean, but the fundamental bandwidth is fixed.
EtherCAT's distributed clock (DC) mechanism synchronises all drives to within 1 µs of each other, regardless of network length or node count. This is the reason EtherCAT dominates in high-performance multi-axis motion. A 16-axis gantry with sub-millisecond cycle times and tight inter-axis synchronisation is straightforward on EtherCAT — it would be challenging on CANopen.
Rule of thumb: If you have more than 6 axes, need coordinated motion with position synchronisation tighter than 1 ms, or plan to expand the system later, EtherCAT is the right choice. For 1–4 axes with standard positioning tasks, CANopen will serve you well at lower cost and complexity.
Wiring and Physical Installation
CANopen requires a linear bus topology with 120 Ω termination resistors at both ends. This is straightforward on paper but creates practical issues: adding a drive mid-installation means cutting the bus, inserting a T-tap, and re-terminating. Cable routing must follow the bus from device to device — you can't run separate cable drops from a panel to each drive.
EtherCAT uses standard Ethernet cable in a daisy-chain. Adding a drive means patching it into the chain. Cable runs can be up to 100 m per segment — practical for large machines where drives are spread across the frame. Industrial RJ45 or M12 connectors are widely available and familiar to panel builders.
Software and Commissioning
CANopen configuration typically involves setting node IDs on each drive (often via DIP switches or a keypad), setting bus baud rate, and configuring PDO mappings in your controller's configuration tool. It's manual but straightforward — most engineers can get a drive running in an afternoon.
EtherCAT master configuration requires importing ESI (EtherCAT Slave Information) XML files for each drive, configuring process data mapping, and tuning distributed clock settings. Tools like TwinCAT, CODESYS, or the open-source EtherLab master handle this, but there's more to learn upfront. Once configured, however, the system is robust and diagnostics are excellent — you can see per-slave cycle times and communication errors in real time.
With DMM-Tech DYN4 Drives
The DYN4 series supports CANopen natively using the CiA 402 motion control profile. This covers Profile Position Mode, Profile Velocity Mode, and Cyclic Synchronous Position/Velocity/Torque modes — everything needed for standard servo applications. Configuration is done through DMM's software or directly via SDO writes from the controller.
For EtherCAT-capable DYN4 variants, the drive presents as a standard CoE (CANopen over EtherCAT) slave, which means the same CiA 402 object dictionary is used — your motion control logic doesn't change, only the physical layer does. This makes migrating from CANopen to EtherCAT relatively painless if you decide to scale up later.
Practical tip: If you're building a system that might expand from 4 to 12 axes over its lifetime, design the cabinet for EtherCAT from the start even if you deploy CANopen initially. The drives support both, and retrofitting EtherCAT into a CANopen-wired panel is straightforward. Retrofitting CANopen topology into an EtherCAT layout is harder.
Summary: Which to Choose
Choose CANopen if:
- You have 1–6 axes with independent or loosely coordinated motion
- Your controller has native CAN hardware but no EtherCAT master
- Budget is tight — CAN hardware is cheaper and widely available
- Your team is already familiar with CANopen commissioning
- Cycle times of 1–5 ms are acceptable for your motion profile
Choose EtherCAT if:
- You have 6+ axes with coordinated, synchronised motion requirements
- Cycle times below 1 ms or inter-axis synchronisation tighter than 500 µs are needed
- Cable runs exceed 30 m between drives
- You are using a CODESYS or TwinCAT-based master that includes an EtherCAT stack
- You expect to scale the system in future
Both protocols work well with DMM-Tech servo drives. The right choice depends on your axis count, synchronisation requirements, and the controller you're building around. If you'd like help selecting and configuring a fieldbus setup for your specific application, get in touch — we commission DMM-Tech servo systems regularly and can advise on your specific requirements.
Comments